Thursday, June 28, 2012

Granny's Fig Preserves

As promised: how to preserve figs. Perfected by Granny, my mom's mom. She loved to garden and grew a beautiful, thriving fig tree behind her old house.

Jars of Goodness
The tree from her backyard has given new life to numerous others. And the family still picks and preserves them every year.

Fig preserves are delicious on toast, biscuits, french toast, pancakes, waffles, and a wide variety of other breakfast goodies. But, it is also amazing with savory dishes. Use the liquid to glaze a pork loin or try out my recipe for Fig and Prosciutto Pizza

Ingredients
  • 18 pints fresh figs
  • 20 cups sugar
  • 1/2 cup water
  • special equipment: 2 12-16 quart metal or stainless steel pots, 5-6 quart-size jars with new lids and screw caps, large-mouthed funnel, large metal ladle

Directions
Stemming the Figs
  1. Wash and stem the fresh figs.
  2. Combine the figs, sugar, and 1/2 cup of water in a 12-16 quart pot.
  3. Cook on medium high heat until sugar dissolves. Stir frequently.
  4. Continue to cook on medium to medium-high heat for 2 1/2-3 hours until the mixture reaches 250 degrees F (use a candy thermometer to monitor the temperature). Stir occasionally.
  5. Starting the Cooking Process
  6. In the meantime, sanitize the jars. Place the quart-size jars, lids, covers, and funnel into a tall 12-16 quart pot. Fill the pot with enough water to cover the tops of the jars.  
  7. Boil the jars on high heat for approximately 15-20 minutes.
  8. Using tongs, remove a jar and the funnel from the boiling water.
  9. Carefully ladle the fig mixture into the jar. Leave one inch of space at the top of the container.
  10. Place a sanitized cover and lid on the jar and screw tightly.
  11. Sealing Inverted Jars
  12. Continue to fill the remaining jars in the same manner.
  13. After filling each container and securing each lid, invert each jar and return it to the hot water in the sanitation pot.
  14. Boil for an additional 10 minutes to seal the jars.
  15. Carefully remove the inverted jars and allow them to cool.
  16. If the fig preserves are sealed properlythe lids will pop as the suction contracts the lids slightly into the jars.
Granny and high school me . . . OH yeah

Tuesday, June 26, 2012

Hummingbird Muffins

Inspired by last week's decadent birthday dessert, I wanted to try to make a more figure-friendly version of the Hummingbird Cake. So, I decided to blend pieces of that recipe with my Apple Cinnamon Muffin recipe to arrive at this delightful concoction.

These muffins are just as tasty as the real confection, but they're not going to make you feel as guilty when you sneak one . . . or two.

Ingredients
  • 1 cup all-purpose flour
  • 1 cup whole wheat pastry flour
  • 1 teaspoon baking soda
  • 1 1/2 teaspoons ground cinnamon
  • 1/4 teaspoon ground nutmeg
  • 1/2 teaspoon salt
  • 3/4 cup light brown sugar, packed
  • 1/2 cup canola oil
  • 2 large eggs
  • 1 cup mashed bananas, approximately two large bananas
  • 8 oz crushed pineapple, undrained
  • 1 teaspoon pure vanilla extract
  • 1/2 cup pecans, chopped (optional)

Directions
  1. Preheat oven 350 degrees F.
  2. Whisk the flour, whole wheat flour, baking soda, cinnamon, nutmeg, and salt in a medium mixing bowl.
  3. Using a stand mixer with a paddle attachment, blend 3/4 cup of light brown sugar and 1/2 cup of canola oil on a low speed setting until thoroughly combined.
  4. Continue to mix on a low speed setting. Add the eggs one at a time.
  5. Add the bananas, pineapple, and vanilla. Mix on low speed setting until combined.
  6. Slowly mix in the dry ingredients in two batches. 
  7. Add the pecans. Turn the mixer off when the mixture is smooth.
  8. Pour mixture into greased muffin pan, filling each cup two-thirds full.
  9. Bake for 23-25 minutes until the muffins are golden brown and risen.
  10. When cool enough to handle, remove muffins from the pan and place onto wire racks to cool completely.

Monday, June 25, 2012

Louisiana Fig Season

This year's early crop is ripe and ready for picking! My parents spent the weekend out in Breaux Bridge collecting a batch of these luscious, honeyed fruits. The fig trees out there are derived from the one planted in my grandmother's old backyard.

Next step? Well, after sneaking a few fresh ones, I'm sure . . . canning the fig preserves. Tune in later this week for a description of that process.

Sunday, June 24, 2012

Sunday Supper - Dijon Pistachio-Crusted Rockfish

After a fun little game that I like to call freezer diving, we found some rockfish fillets that Jared caught out on the Indian River Inlet in Delaware. Every year, he and his buddy head out there (or the Chesapeake Bay) in late spring to camp out, drink whiskey, and battle waves in the middle of the night to reel in the big ones.

The best f#$%ing angler EVER!!
While some rockfish is farmed, most of it is wild-caught. Like any other kind of seafood, be sure to know where it comes from and check the population and consumption advisories for that area. Otherwise, your future children may have a few extra heads or arms or something. 

Rockfish (also known as striped bass) is mild-flavored, flaky fish. The tangy dijon mustard, nutty pistachios, and sharp Parmesan cheese add just the right punch to this crowd-pleasing dish. The recipe also works well with salmon, halibut, and mahi mahi.

Ingredients
  • 1/2 cup unsalted pistachios, shelled
  • 1/3 cup panko breadcrumbs
  • 2 tablespoons Parmesan cheese, freshly grated
  • 1/4 teaspoon salt
  • 1-2 tablespoons extra virgin olive oil
  • 4 (3 oz) wild rockfish fillets
  • 2 tablespoons Dijon mustard
  • black pepper to taste

Directions
  1. Preheat oven to 425 degrees F.
  2. In a food processor, combine nuts, breadcrumbs, cheese, salt, and pepper. Pulse mixture until fine.
  3. Transfer mixture to a small bowl. Drizzle with olive oil and toss with a fork until crumbs are well moistened.
  4. Generously spread the Dijon mustard on the top of each fillet.
  5. Press the mustard-coated side of the fish into the crumb mixture until evenly coated.
  6. Place the fillets, coating side up, on a greased baking sheet.
  7. Sprinkle the remaining crumbs over the fillets to form a thick crust.
  8. Bake for 10-12 minutes.
  9. Broil for 2-3 additional minutes until the topping is crisp and browned and the fish is cooked through.

Thursday, June 21, 2012

Home Plate Box at Nationals Park

My birthday gift to Jared this year consisted of some ballin' tickets to last night's Nationals vs. Rays game. I splurged a bit and got tickets in the Home Plate Box. We were so close you could almost reach out and stroke Bryce Harper's mohawk. Ok, not really. But we were close. 

The Loaded Chili NAT-chos
The box provides complimentary food, beer, wine, and soft drinks AND in-seat service. 

That's right. We didn't have to miss a second of the game to grab another beer or stock up on peanuts and cracker jack. 

If you have the means, I highly recommend it. 


We just sat back in our cushy seats (literally . . . these seats are padded for extra comfort) and watched the Nats take the lead and hold on to it for a win.

Now it's back to the nosebleed section for the rest of the season. We'll be drowning our sorrows with beer and Ben's Chili Bowl.


Wednesday, June 20, 2012

Sweet Corn and Blueberry Salad

My sister-in-law Lydia made this amazing salad for our Sunday afternoon food fest this past weekend. It sounds a like a strange combination, but the sweet corn and tangy blueberries work surprisingly well together. This dish is light and refreshing with a spicy kick from the jalapeño. 

It was a little early for sweet corn, but next month will be perfect for this fresh summer salad.

Ingredients
  • 6 ears of sweet corn, husked
  • 1 cup fresh blueberries
  • 1 cucumber, sliced
  • 1/4 cup finely chopped red onion
  • 1/4 cup chopped fresh cilantro
  • 1 jalapeño pepper, seeded and finely chopped
  • 2 tablespoons lime juice
  • 2 tablespoons olive oil
  • 1 tablespoon honey
  • 1/2 teaspoon ground cumin
  • 1/2 teaspoon salt
Directions
  1. In large pot, bring salted water to a boil.
  2. Add corn and cook, covered, for 5 minutes, or until tender.
  3. When cool enough to handle, cut corn from cobs.
  4. In a serving bowl, combine the corn, blueberries, cucumber, red onion, cilantro, and jalapeno.
  5. Whisk the lime juice, oil, honey, cumin, and salt together in a separate bowl.
  6. Add the mixture to salad and toss gently.
  7. Cover and refrigerate overnight (up to 24 hours).
     * This recipe is adapted from Better Homes and Gardens.

Monday, June 18, 2012

Hummingbird Cake

 Today is the first anniversary of Jared's 30th birthday! Or is it the second anniversary of his 29th birthday? Either way, today is the day.

We spent Saturday afternoon fishing for catfish out of Algonkian Park and had a delicious and gigantic Father's Day/birthday feast out in Centreville yesterday. I get full just thinking about the leftovers sitting in the fridge right now.

We also have some pretty amazing tickets to the National's game on Wednesday night. So we'll be extending the celebration for a few more days. As I believe everyone should . . .

The birthday cake of choice? A Mott-family favorite: hummingbird cake. Which I had never heard of until a few short years ago. Similar to a carrot cake, this dessert is dense and spicey, but nixes the carrots in favor of bananas and pineapples. The fruit adds just the right touch of sweetness and helps to create a moist, textured cake. Top it with cream cheese frosting and you are good to go.

Ingredients

Hummingbird Cake
  • 3 cups all-purpose flour
  • 1 teaspoon baking soda
  • 1/2 teaspoon salt
  • 1 1/2 teaspoon ground cinnamon
  • 2 cups sugar
  • 3 eggs, beaten
  • 3/4 cup vegetable oil
  • 1 1/2 teaspoons pure vanilla extract
  • 10 oz crushed pineapple, undrained
  • 2 cups banana, mashed
  • 1 cup chopped pecans (optional)
Cream Cheese Frosting
  • 8 oz cream cheese, softened
  • 1/4 lb butter, softened
  • 1 teaspoon pure vanilla extract
  • 3-4 cups confectioners' sugar

Directions

Hummingbird Cake
  1. Preheat oven to 350 degrees F.
  2. In a large bowl, combine flour, baking soda, salt, cinnamon, and sugar.
  3. Add in the eggs and oil, stirring until flour mixture is moistened - do not beat.
  4. Mix in the vanilla, pineapple, bananas, and pecans until combined.
  5. Pour batter into 3 greased and floured 8-inch round pans.
  6. Bake for 23-28 minutes.
  7. Remove cakes from the oven and cool in pans for 10 minutes.
  8. Invert onto wire racks to cool completely.
  9. Frost with cream cheese frosting.
Cream Cheese Frosting
  1. Using a stand mixer with a paddle attachment, mix the butter, cream cheese, and vanilla on medium speed.
  2. Slowly add in the sugar in 2 or 3 batches.
  3. Beat until smooth.

Sunday, June 17, 2012

Sunday Supper - Surf and Turf Kebabs over Cheese Grits

Happy Father's Day to all of you dads out there!! Sadly, I can't be back at home in Louisiana to celebrate with Pete, but I am lucky enough to get to spend the afternoon grilling and relaxing with the in-laws. 

 Today's menu includes all sorts of goodies, including a corn and blueberry salad and hummingbird cake for dessert (these posts coming soon, don't worry). The main event, though, is a veritable grilled meat smorgasbord served atop creamy, cheesy grits. 

It's a combination of a few of my mother-in-law's favorite recipes thrown together to make one tasty meal that any dad is sure to enjoy!

Ingredients

Andouille-Stuffed Grilled Shrimp
  • 4 egg yolks
  • 1 tablespoon dijon mustard
  • 1/4 cup balsamic vinegar
  • 1 cup canola oil
  • 1 cup light olive oil
  • warm water, as needed
  • 2 tablespoons Lawry's seasoned salt
  • 1/4 cup Pete's Good Stuff Seasoning Mix
  • 1 tablespoon lemon pepper seasoning
  • 36 large shrimp, pealed, butterflied, and deveined
  • 4 oz andouille sausage, cut into matchstick-sized strips
  • special equipment: wooden skewers, pre-soaked in water
Spicy Beef Kebabs
  • 2 lbs boneless beef sirloin
  • 3 cloves of garlic, minced
  • 2 teaspoons smoked paprika
  • 1/2 teaspoon ground turmeric
  • 1 teaspoon ground cumin
  • 1 teaspoon kosher salt
  • 1/2 teaspoon black pepper
  • 1/3 cup red wine vinegar
  • 1/2 cup olive oil
  • special equipment: toothpicks, pre-soaked in water
     * Kebab recipe is adapted from Alton Brown.
    Baked Cheese Grits
    • 2 cups yellow corn grits, not quick or instant
    • 1/4 lb butter
    • 1 1/2 teaspoons salt
    • 1/2 teaspoon black pepper
    • 2 tablespoons garlic, chopped
    • 8 oz sharp cheddar, grated
    • 3 eggs
    • 1 cup milk

    Directions

    Andouille-Stuffed Grilled Shrimp
    1. Blend the egg yolks, dijon mustard, and vinegar in a food processor on medium speed for 1-2 minutes.
    2. Slowly drizzle the oils into the mixture, 1 tablespoon at a time.
    3. If the marinade becomes too thick, add 1-2 tablespoons of warm water.
    4. Add seasoned salt, Pete's Good Stuff seasoning, and lemon pepper, until incorporated.
    5. Toss mixture with shrimp and marinate for at least 30 minutes.
    6. Preheat the grill to medium-high heat.
    7. Place one piece of andouille lengthwise down the center of each shrimp.
    8. Close each shrimp with toothpicks to secure the sausage.
    9. Place a grill screen over direct high heat. Add the shrimp to the grill and cook for 6-8 minutes, turning once.
    10. Remove and serve over baked cheese grits.
    Spicy Beef Kebabs
    1. Cut the beef into 1 1/2 to 1 3/4-inch cubes and place into a large mixing bowl. Set aside.
    2. Add the garlic, paprika, turmeric, cumin, salt, pepper and red wine vinegar in a food processor. Blend on low speed. 
    3. Slowly drizzle in the olive oil.
    4. Pour the marinade over the meat and toss to coat. Place in the refrigerator in an airtight container or a sealable plastic bag and allow to marinate for 2 to 4 hours.
    5. Preheat the grill to medium-high heat. 
    6. Thread the meat onto the skewers leaving about 1/2-inch in between the pieces of meat.
    7. Place on the grill and cook, with lid lowered, 2 to 3 minutes per side, 8 to 12 minutes in all (8 minutes for rare and 12 for medium). 
    8. Remove from the heat to aluminum foil, wrap and allow to rest for 2 to 3 minutes prior to serving.
    9. Remove and serve over baked cheese grits.
         * Kebab recipe is adapted from Alton Brown. 

      Baked Cheese Grits
      1. Preheat oven to 350 degrees F.
      2. Prepare the grits according to package directions.
      3. Add the butter, salt, black pepper, garlic, and cheese. Mix until the butter and cheese melt.
      4. Beat the eggs and milk together in a small bowl.
      5. Add mixture to the grits and mix well. 
      6. Pour into a square 8x8 baking dish and bake for approximately 1 hour, or until mixture sets.

      Friday, June 15, 2012

      Garlic and Rosemary Smashed Potatoes

      Potatoes sometimes get a bad rap. Yes, they are high in starchy carbs, but they're a good source of fiber, potassium and vitamin C, especially if you eat the skin. This recipe for smashed potatoes helps you do just that. 

      These spuds are crispy on the outside and tender in the middle. They are not really like a baked potato, but they're are definitely not mashed potatoes. Seasoned with a touch of salt and pepper and a healthy dose of garlic powder and rosemary, this side dish is a great addition to any meal. Serve it up with grilled meats and veggies, or just about anything that you enjoy.

      Ingredients
      • 1 lb new potatoes (red- or yellow-skinned), cleaned
      • 3 tablespoons extra virgin olive oil
      • 1/2 teaspoon garlic powder
      • 1/2 teaspoon fresh rosemary, chopped
      • 1/4 teaspoon salt
      • pepper to taste
      • cooking spray

      Directions
      1. Preheat oven to 400 degrees F.
      2. Toss the potatoes together with 2 tablespoons of olive oil. Coat thoroughly. Try to use potatoes that are roughly the same size to ensure even cooking.
      3. Roast on a greased baking sheet for 25-30 minutes until slightly tender.
      4. Remove the pan from the oven and place it on heat-friendly surface.
      5. Grease the back of another baking sheet and place it on top of the potatoes. Using even pressure, push the baking sheets together to smash the potatoes down to 1/2 inch thickness.
      6. Remove the second baking sheet and season the smashed potatoes with the garlic powder, rosemary, salt, and pepper. 
      7. Drizzle the tops of the potatoes with the remaining olive oil. Place back in the oven.
      8. Bake for an additional 10-15 minutes until the potatoes are crisp and golden brown.

      Wednesday, June 13, 2012

      Apple Cinnamon Muffins

      Looking for an early morning pick me up? Or a healthy option for that fabulous brunch spread you're planning? This recipe is perfect!

      Ingredients
      • 1 cup all-purpose flour
      • 1/2 cup quick-cooking rolled oats
      • 1/2 cup whole wheat pastry flour
      • 1 teaspoon baking soda
      • 1 1/2 teaspoons ground cinnamon
      • 1/4 teaspoon ground nutmeg
      • 1/2 teaspoon salt
      • 3/4 cup plus 2 tablespoons light brown sugar, packed
      • 1/2 cup canola oil
      • 2 large eggs
      • 1 cup natural applesauce
      • 1 teaspoon pure vanilla extract
      • 3/4 cup low fat buttermilk

      Directions
      1. Preheat oven 400 degrees F.
      2. Coat muffin pan with cooking spray.
      3. Whisk the flour, whole wheat flour, oats, baking soda, salt, cinnamon and nutmeg in a medium mixing bowl.
      4. Using a stand mixer with a paddle attachment, blend 3/4 cup of light brown sugar and 1/2 cup of canola oil on a low speed setting until thoroughly combined.
      5. Continue to mix on a low speed setting. Add the eggs one at a time.
      6. Add the applesauce and vanilla.
      7. Slowly add the dry ingredients in two batches, alternating with the buttermilk. Turn the mixer off when the mixture is smooth.
      8. Pour mixture into greased muffin pan, filling each cup two-thirds full.
      9. Sprinkle the remaining 2 tablespoons of brown sugar on top.
      10. Bake for 15 minutes until the muffins are dark and risen.

      Tuesday, June 12, 2012

      Fig and Prosciutto Flatbread

      I don't know if I love figs because they are so stinking delicious, or if it's the memory of picking them with my grandmother in her backyard. Probably a little of both. 

      Every year, the family still goes out to pick figs to enjoy fresh and to preserve for year-round tastiness. I managed to score a few jars of preserves last year and break into them our from time to time (not too often for fear of running out before I have a chance to replenish the stock).

      This recipe features figs in a fun and rustic way, pairing it with savory prosciutto. Hope you enjoy it as much as I do.

      Ingredients
      • 3/4 to 1 cup Granny's Fig Preserves
      • 1 large onion, sliced
      • 1 tablespoon extra virgin olive oil
      • 1/2 teaspoon salt
      • 4-5 strips of prosciutto, cut into smaller strips
      • 3/4 cup (6 oz) crumbled goat cheese
      • 1 (16 oz) fresh pizza dough (I recommend Trader Joe's plain pizza dough)

      Directions
      1. Preheat the oven to 450 degrees F. 
      2. Let the pizza dough come to room temperature and rest on the counter for at least 20 minutes.
      3. Flour the dough ball and set aside.
      4. In a small saucepan, heat the olive oil on medium. Add the onions and sprinkle with salt. Sauté for 15-20 minutes until the onions are a golden, caramel color. Remove from heat.
      5. Using a food processor, pulse the fig preserves until smooth, if needed.
      6. Roll the pizza dough out to 1/4 to 1/8 inch thickness on a floured surface. Do not worry about it being a perfect circle.
      7. Place the dough on a greased baking sheet or pizza stone.
      8. Spread the fig preserves evenly on the dough. Top with the onions, prosciutto strips and crumbled goat cheese.
      9. Bake for 15-20 minutes until crust is firm and golden brown. 

      Monday, June 11, 2012

      Crawfish Stock

       Yesterday, we spent an awesome afternoon at a crawfish boil on the Anacostia River waterfront. Burning lips, Abita beer, 90-something degree weather . . . it felt like I was back at home.

      To our surprise (and delight), there were crawfish left over. So, we grabbed a box and spent the evening peeling the uneaten loot. The tail meat was prepped for freezing and the shelled crawfish heads were saved to make an absolutely amazing seafood stock. 

      Now some people are purists when it comes to making a crawfish stock, insisting that you take the time to thoroughly rinse the shells to remove the boil seasoning. This method makes for a more delicate, subtle flavor. But I was a little tired and lazy last night, so I just threw everything in the stock pot and let it rip.

      After about an hour, you have a great base for anything from bisques and gumbos and to crawfish pies, jambalaya and risottos.

      Ingredients
      • 2 quarts leftover boiled crawfish shells
      • 1 large onion, chopped
      • 6-8 cloves of garlic, peeled and smashed
      • 1 bunch of fresh thyme
      • 1-2 bay leaves
      • water

      Directions
      1. Place the seasoned crawfish shells into a large stock pot. Add just enough water to cover.
      2. Add the remaining ingredients and bring to a boil.
      3. Reduce the heat and simmer for approximately 40-50 minutes. Let cool.
      4. Strain the stock through cheesecloth or a fine mesh sieve.
      5. Store in the refrigerator and use within 2-3 days. Freeze for later use.
      Post-boil peeling set up on the balcony.

      Sunday, June 10, 2012

      Sunday Supper - Venison Spaghetti

      Sorry Bambi, avert your eyes from this recipe . . .

      I, of course, watched that movie when I was little. And thought all of the little animals were adorable. But, I also grew up in south Louisiana, where most of my cousins hunted for all sorts of cute and fuzzy creatures that turned out to be quite delicious and nutritious.

      So, when Jared came along with his deer hunting habit, I welcomed it with open arms . . . or should I say mouth? Mainly because, I already had a few ideas for how to prepare this tasty meat.

      Thanks to a steady supply of frozen venison burger (which Jared and his dad prepare with a bit of beef trimmings), we haven't had to buy ground beef in years. No horrific pink slime in our kitchen! 

      Here's our take on the traditional spaghetti with meat sauce. 

      Ingredients

      Venison Spaghetti
      • 1 lb ground venison
      • 2 tablespoons extra virgin olive oil
      • 1/2 onion, chopped
      • 3 cloves of garlic, minced
      • 1 teaspoon Pete's Good Stuff Seasoning Mix
      • marinara sauce (can substitute with a 24-32 oz container of pre-packaged sauce)
      Marinara Sauce
      • 1/4 cup extra virgin olive oil
      • 6 cloves of garlic, minced
      • 1 small onion, chopped
      • 1/2 cup dry red wine
      • 1 (28 oz) can crushed tomatoes
      • 1 1/2 teaspoon salt
      • 1/2 teaspoon black pepper
      • 1 tablespoon flat-leaf parsley, chopped (or 1 teaspoon dried parsley)
      • 1 dried bay leaf

      Directions

      Venison Spaghetti
      1. Prepare the marinara sauce, if making from scratch. Set aside.
      2. Cook spaghetti in separate pot according to package instructions. Drain and set aside.
      3. Heat one tablespoon of the olive oil in a large saucepan or cast iron pot.
      4. Add the onion and sauté for 6-7 minutes on medium-high heat.
      5. Add the garlic and cook for 1 more minute.
      6. Drizzle the pan with one additional tablespoon of olive oil. Add the ground venison.
      7. Brown the meat. Sprinkle with Pete's Good Stuff seasoning.
      8. Add marinara sauce. Simmer for 5 minutes.
      9. Reduce heat. Cook for another 10-15 minutes.
      Marinara Sauce
      1. In a large cast iron pot, heat the oil on medium-high.
      2. Add the onions and sauté for 8-10 minutes.
      3. Add the garlic and cook for 1 more minute.
      4. Add the wine and cook on high heat, scraping up all the brown bits in the pan, until almost all the liquid evaporates, about 3 minutes.
      5. Stir in the tomatoes, salt, pepper, parsley and bay leaf.
      6. Simmer uncovered over low heat until the sauce thickens, about 1 hour. Remove and discard the bay leaf.
      7. Salt and pepper to taste.
      8. The sauce can be made ahead of time. Cool, then cover and refrigerate. Rewarm over medium heat before using.

      Thursday, June 7, 2012

      Roasted Broccoli with Garlic and Red Pepper

      Need more vegetables in your life? Here's a little twist on some leafy greens.

      Ingredients
      • 1 head of broccoli, separated into florets
      • 1-2 tablespoons extra virgin olive oil
      • 4 cloves of garlic, minced
      • 1/2 teaspoon crushed red pepper
      • 1/4 teaspoon salt

      Directions
      1. In a small saucepan, heat the oil on medium.
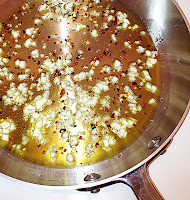
      2. Add the garlic and crushed red pepper. Cook for 3-5 minutes, until fragrant.
      3. Cover and let steep for up to an hour.
      4. Preheat oven to 375 degrees F.
      5. Toss the broccoli florets with the garlic pepper oil. Place on a greased baking sheet.
      6. Roast in the oven for 30-40 minutes.

      Wednesday, June 6, 2012

      Corn Maque Choux

      This is, hands down, my favorite Cormier family recipe. And after years of practice, I can FINALLY say that mine is just as good as my dad's and my grandmother's. This dish is essential just smothered corn and peppers, but its simple, slow preparation creates multiple levels of amazing flavor.

      I love corn maque choux. I love it as a side with just about anything, and as a main course, all by itself. I will eat it hot or cold, for lunch or dinner . . . hell, I've probably eaten it for breakfast at some point.

      But let me clarify -- I don't love all maque choux. Mostly just this maque choux.

      I have attempted other variations and have tried it at many different restaurants, but I have yet to find a recipe that rivals this one. So, today, I shall post it here in hopes of spreading better maque choux out to the rest of the world.

      Ingredients
      • 3 lbs whole kernel sweet corn
      • 1 large onion, diced
      • 1 green bell pepper, diced
      • 1 red bell pepper, diced
      • vegetable oil
      • salt and black pepper to taste

      Directions
      1. In a food processor, pulse the corn 10 times (or more) to the desired consistency -- somewhere between whole kernels and creamed corn. Depending on the size of your processor, you may have to do this in batches.
      2. Heat 1/8-1/4 inch of vegetable oil in the bottom of a large cast iron pot on medium high.
      3. Add the corn, onion, and peppers and cook for 60-90 minutes over enough heat to create minimal grillade on the bottom of the pan (medium - medium high heat).
      4. Scrape the corn off of the bottom of the pot frequently to avoid burning -- every 2-3 minutes at first, then every 5-10 minutes once the heat levels off.
      5. Salt and pepper generously about 10 minutes before you remove from heat.

      Monday, June 4, 2012

      Mixed Berry Smoothie

      Good morning sunshine! Smoothies are a great way to start your day. And a great way to fight against a case of the Mondays. So, take five minutes to throw this in the blender before heading out the door. Switch up the berries with your favorites or whatever you have available.

      Ingredients
      • 1 cup strawberries
      • 1/2 cup blueberries
      • 1/4 cup blackberries
      • 1/2 cup non-fat, plain greek yogurt
      • 1 teaspoon honey
      • 5-6 ice cubes

      Directions
      1. Combine all ingredients in a blender. 
      2. Mix on high until smooth.